BITGET 2FA | HOW TO SET UP GOOGLE AUTHENTICATOR CODE
- Open your Bitget application and log in using the account you registered previously
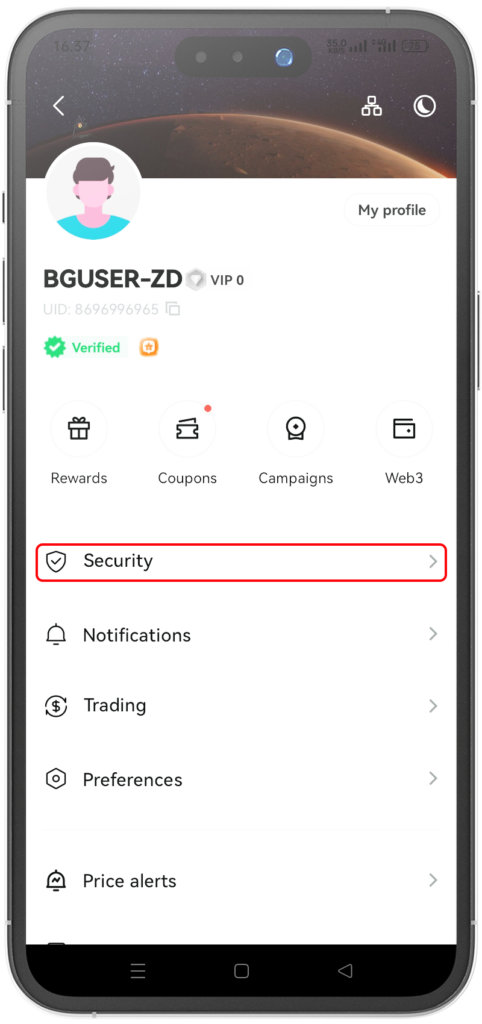
- In the initial Bitget display, please select the profile menu (as shown in the image)

3. Select the SECURITY menu (as shown in the picture)
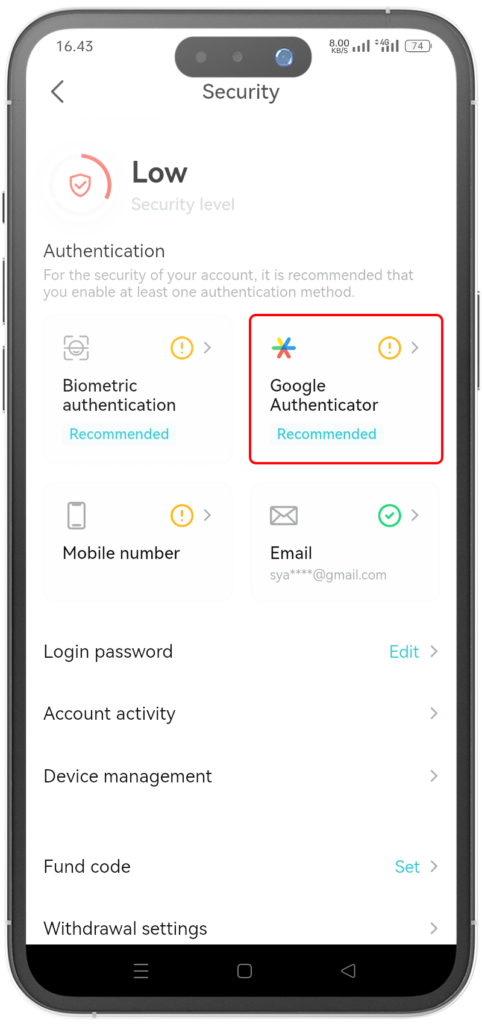
4. Select menu ‘Google Authenticator’ (as shown in the picture)
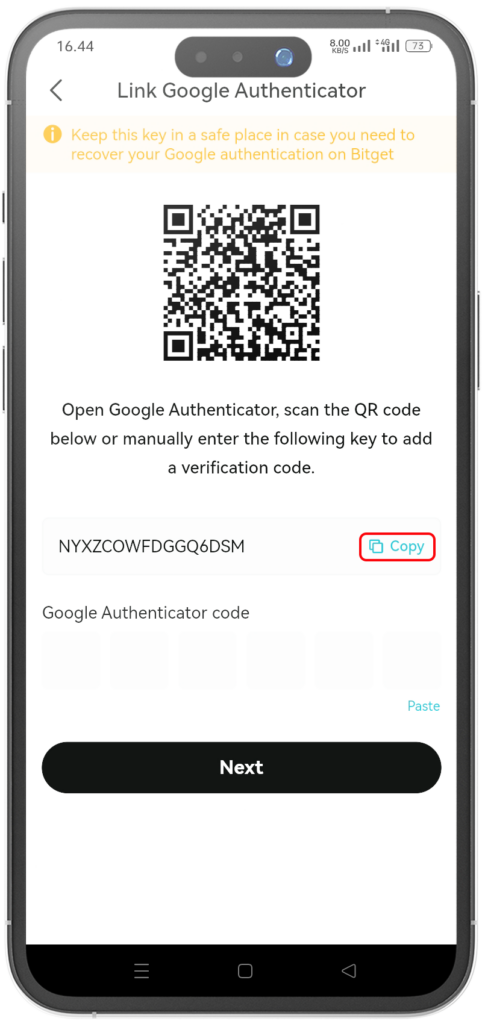
5. If you do not have the google authenticator application, please select download first, if you already have the google authenticator application, please select “next” menu (as shown in the picture)

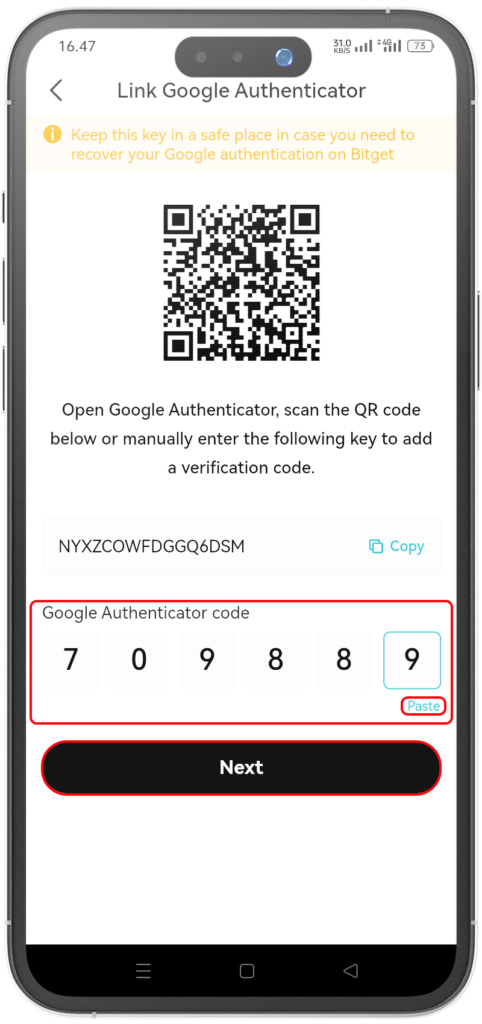
6. Copy the following key (as shown in the picture) to add a verification code
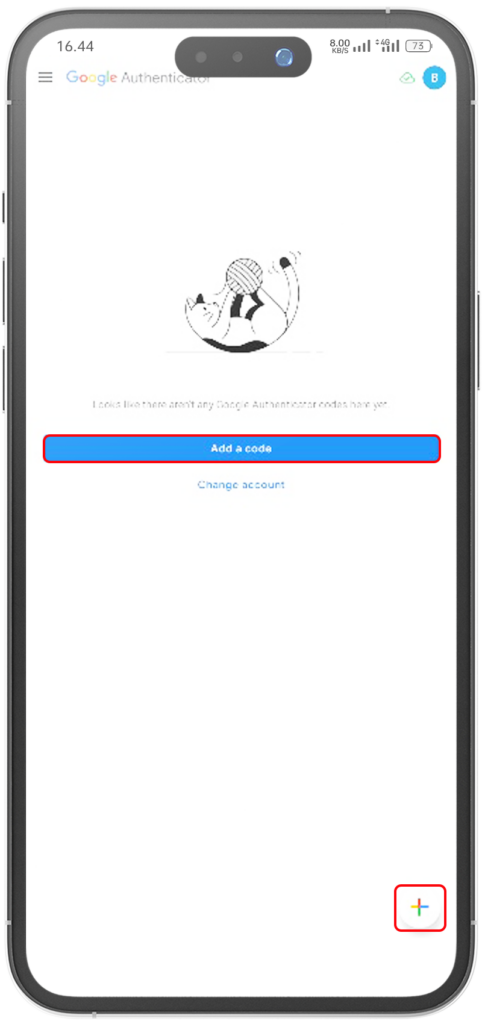
7. Move to the Google Authenticator Application (without closing the Bitget application) on the start page select the ‘Add Code’ menu (as shown in the picture)
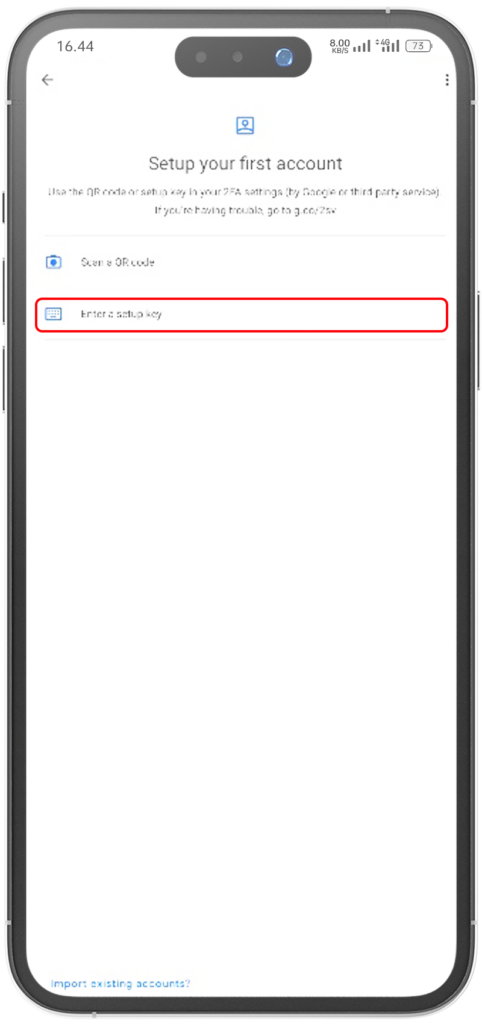
8. Select the ‘Enter a setup key’ menu (as shown in the picture)
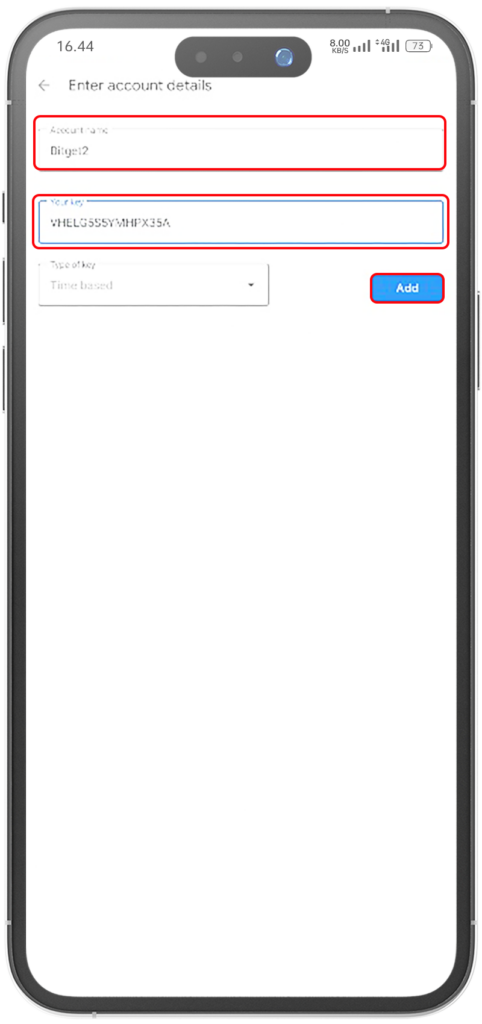
9. Create labels/naming as you wish (as shown in the picture) and than paste the key (as shown in the picture) and click add menu (as shown in the picture)
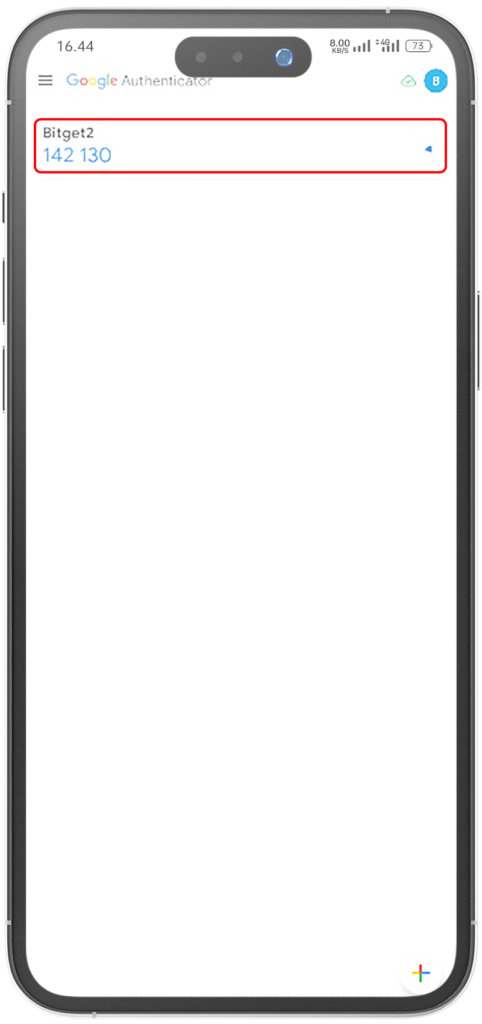
10. Copy the authenticator code (as shown in the picture)
11. Return to the Bitget application and paste the authenticator code that you copied earlier in the column provided (as shown in the picture) than click Next (as shown in the picture)
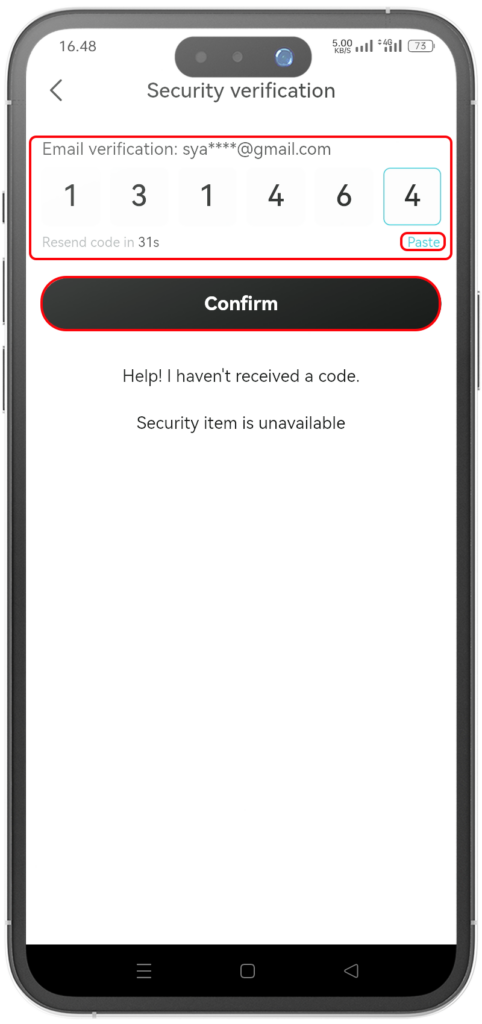
12. Paste the email verification code (as shown in the picture) than click Confirm (as shown in the picture)